Playbooks Iterator Operator
- 11 Apr 2024
- 6 Minutes to read
-
Print
-
DarkLight
Playbooks Iterator Operator
- Updated on 11 Apr 2024
- 6 Minutes to read
-
Print
-
DarkLight
Article Summary
Share feedback
Thanks for sharing your feedback!
Overview
The Playbooks Iterator Operator in ThreatConnect® iterates through items in an input array or set of arrays, applies any logic available with Playbooks to each item, and returns the output to the Playbook. This capability expands Playbook applications beyond set-based use cases.
Before You Start
| Minimum Role(s) |
|
|---|---|
| Prerequisites | Playbooks enabled by a System Administrator |
Iterator Operator
To illustrate the process of creating and configuring an Iterator Operator, we use an example in which we want to iterate through a set of attachments to an email and send the attachments that contain the word “bad” further through the Playbook.
- On the top navigation bar, click Playbooks to display the Playbooks screen.
- Create a new Playbook or open an existing one.
- Add Triggers, Apps, and Operators to the Playbook as desired. In this example, we add and configure a Mailbox Triggerso that the Playbook will take an email as its input (Figure 1).NoteThis article does not cover configuration of the Mailbox Trigger.
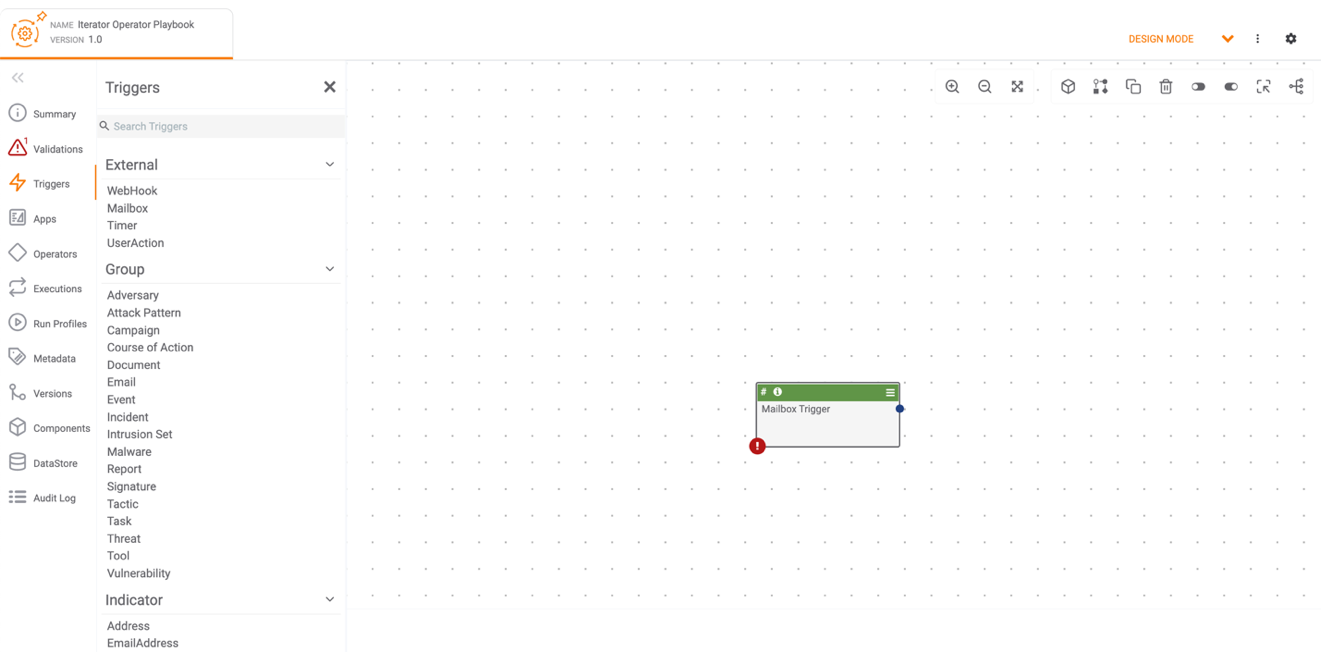 NoteThe Validations
 icon on the side navigation bar will show one error, at minimum, until the Playbook has been fully created and validated.
 - Click
 Operators on the side navigation bar of the Playbook Designer and select Iterator from the list. An Iterator Operator will be displayed in the Playbook Designer (Figure 2).
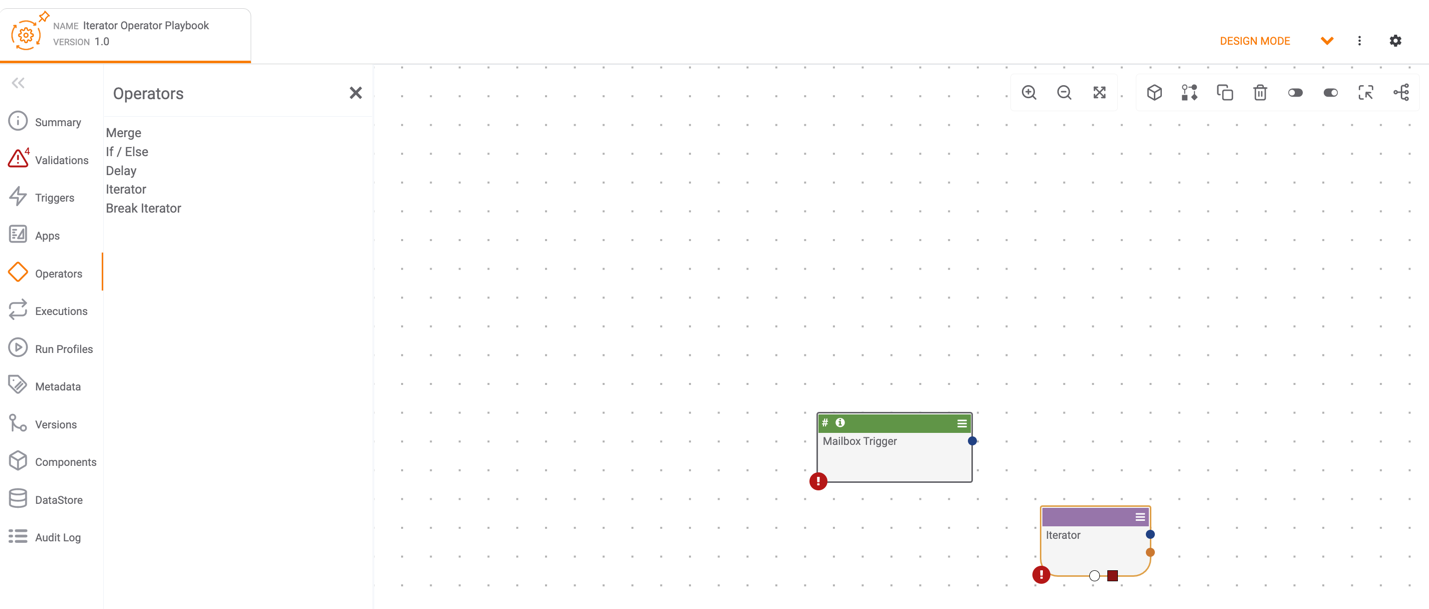
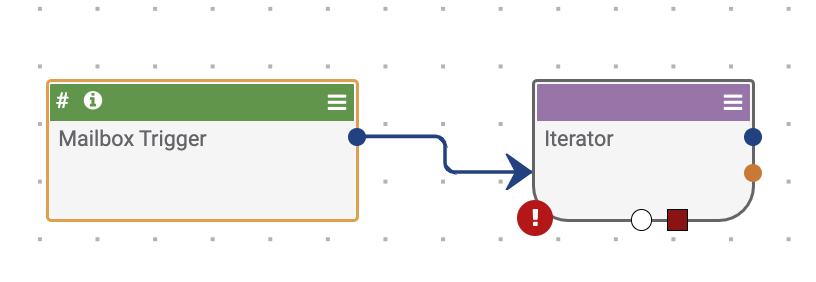
- Position the Iterator Operator as desired, and then connect the Mailbox Trigger to the Iterator Operator by dragging the Trigger’s blue circle node to the Iterator Operator (Figure 3).
- Double-click the Iterator Operator to display the Edit App configuration pane on the left side of the Playbook Designer (Figure 4).
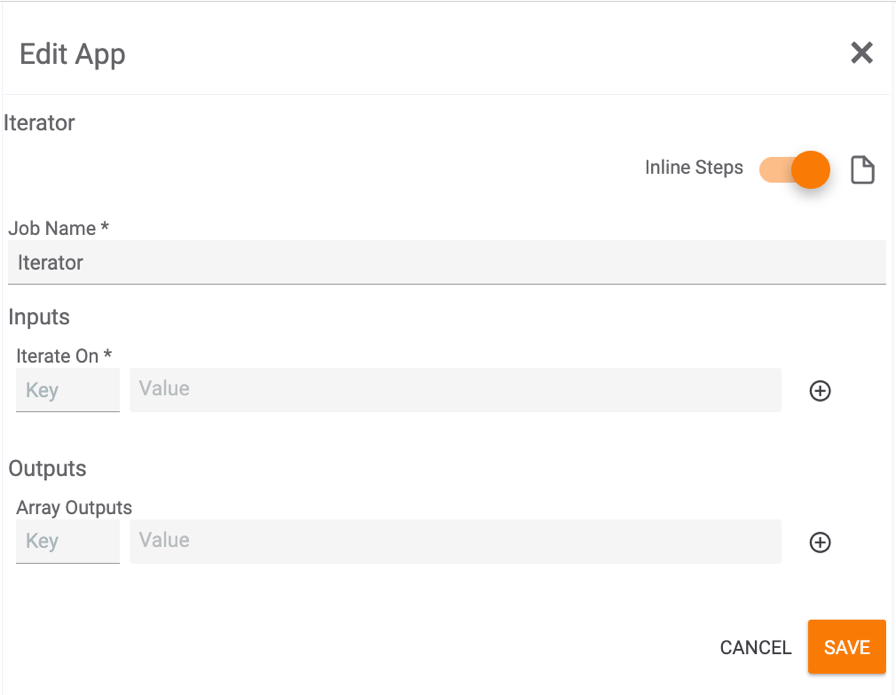
- Job Name: Enter a name for the Iterator Operator.
- Inputs: In the Key field, enter a name for the array on which the Operator will iterate (e.g., “Filename”). In the Value field, enter a hashtag (#) to display a list of all upstream array variables, and then select an array from the list. Click the plus
 button to the right, and a table with the key/value pair will be displayed (Figure 5). Add as many inputs as desired. Click the
  ,
,  , or
, or  icon to edit, duplicate, or delete a key/value pair, respectively.
 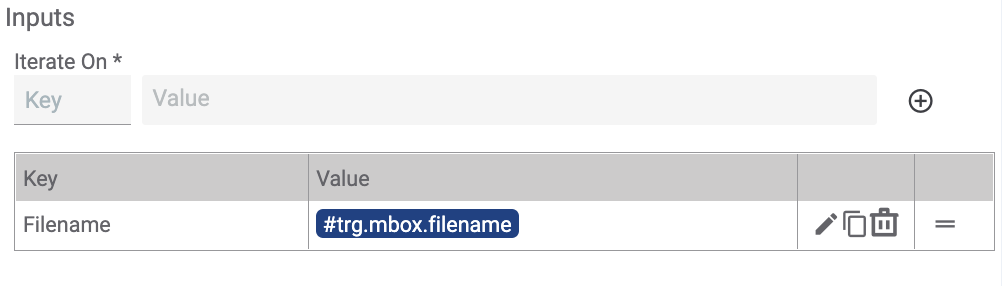 ImportantWhen more than one input array is defined, all input arrays must match in length or else the iteration operation will fail when the Playbook runs.NoteWhen editing an entry in the table, the Iterate On fields will populate with the key/value pair. Make the changes in those fields, and then click the checkmark or X icon to accept or reject the changes, respectively. You can duplicate a key/value pair and then edit the copy in order to create a new pair based on an existing pair. If you duplicate the same pair more than once without changing the first copy’s key, duplicate entries will be displayed in the table, an error notification will be displayed at the bottom left of the screen, and you will be prevented from saving the Iterator Operator’s configuration until you change the name of all copies with the same key. To copy only the contents of a key or value field in the table, use your browser’s copy functionality (e.g., Command-C).
- Click the SAVE button without adding output variables. The Iterator Operator has two nodes at the bottom (see Figure 3) that are used to create a loop to send items sequentially through an operation or series of operations and then return the results to the Iterator Operator. Output variables are used to pass information back to the Iterator Operator from this loop, but first the loop must be created, and the list of potential values must be populated by the Apps that form the loop. As such, the output variables must be added after the loop has been created. On the other hand, input variables for the Iterator Operator must be configured in order to start the loop.
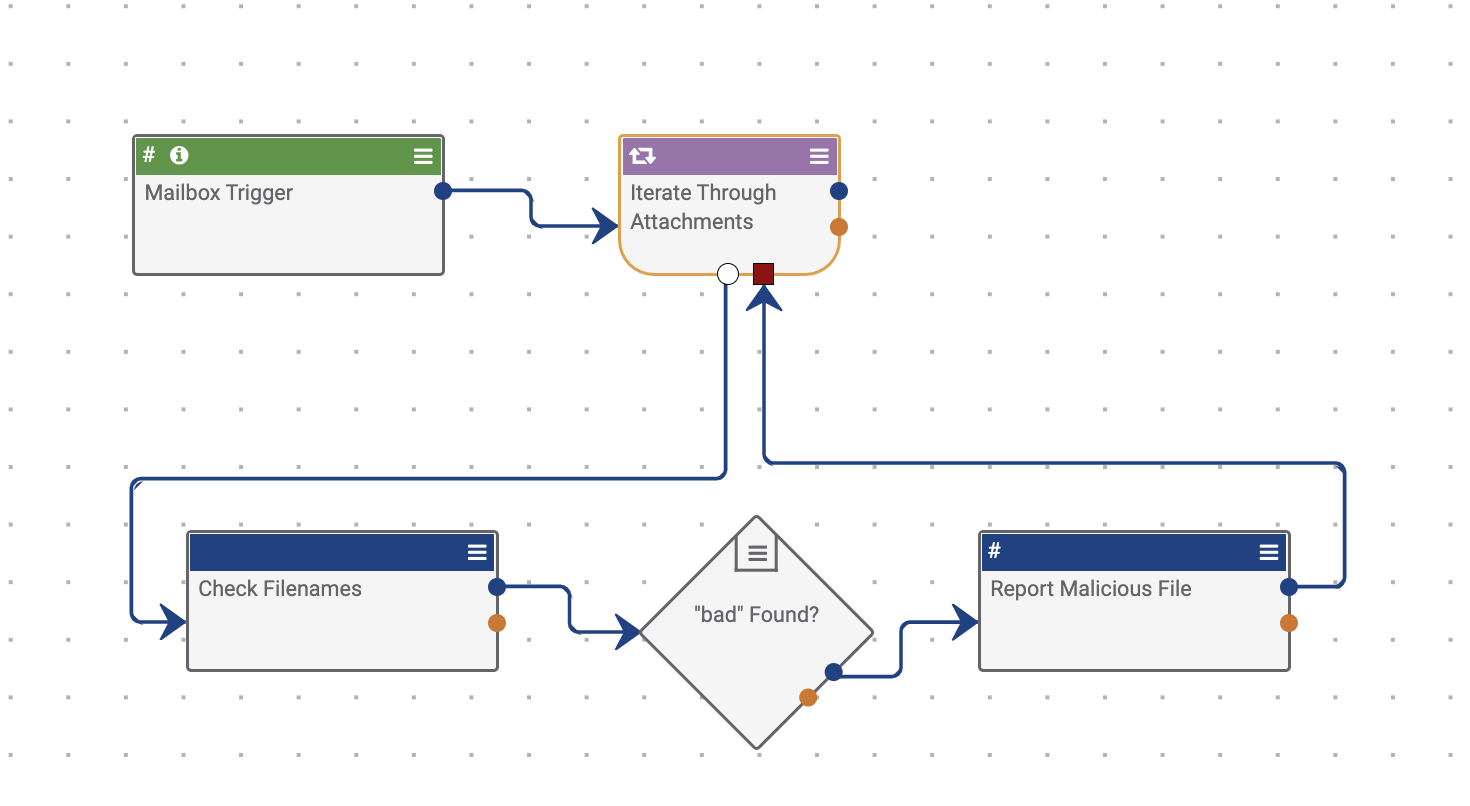
- Create and configure the Apps and Operators that compose the loop operations for the Iterator Operator, and connect them to the Iterator Operator. The white circle node is the start point of the loop, and the red square node is the end point of the loop. In Figure 6, the Iterator Operator sends each file from the Mailbox Trigger to an App that checks the filename. If the term “bad” is found, then an App reports the file as malicious, and the loop closes with a return to the Iterator Operator, which moves to the next item in the array sent by the Mailbox Trigger.ImportantWhen dragging a connection to the red square node, make sure to connect to the square node itself rather than the Iterator as a whole.
- Double-click the Iterator Operator to edit it again in order to add outputs (Figure 7). The outputs of the Iterator Operator are non-array variables that are collected into a single array and exposed to downstream Apps.ImportantArray values are not allowed in this parameter.

- Outputs: In the Key field, enter a name for array that the Operator will return to the rest of the Playbook (e.g., “Bad_Files”). In the Value field, enter a hashtag (#) to display a list of all non-array variables that are available inside the loop logic, and then select a variable from the list. Click the plus
 button to the right, and a table with the key/value pair will be displayed (Figure 8). Add as many outputs as desired. These output variables will be available as arrays for downstream Apps. Click the
  ,
,  , or
, or  icon to edit, duplicate, or delete a key/value pair, respectively.
 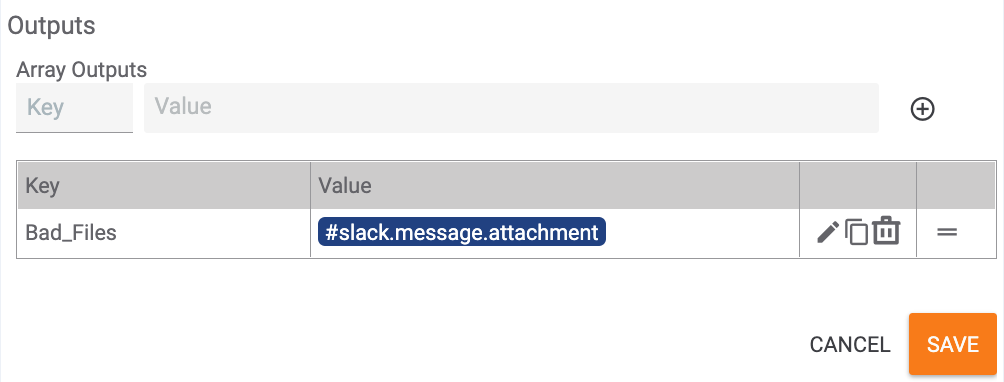 NoteWhen editing an entry in the table, the Array Outputs fields will populate with the key/value pair. Make the changes in those fields, and then click the checkmark or X icon to accept or reject the changes, respectively. You can duplicate a key/value pair and then edit the copy in order to create a new pair based on an existing pair. If you duplicate the same pair more than once without changing the first copy’s key, duplicate entries will be displayed in the table, an error notification will be displayed at the bottom left of the screen, and you will be prevented from saving the Iterator Operator’s configuration until you change the name of all copies with the same key. To copy only the contents of a key or value field in the table, use your browser’s copy functionality (e.g., Command-C).
- Outputs: In the Key field, enter a name for array that the Operator will return to the rest of the Playbook (e.g., “Bad_Files”). In the Value field, enter a hashtag (#) to display a list of all non-array variables that are available inside the loop logic, and then select a variable from the list. Click the plus
- Click the SAVE button to save the configuration. To view the loop variables, hover the cursor over the
 icon of the Iterator Operator (Figure 9).NoteLoop variables are available to all Apps and Operators inside the loop.
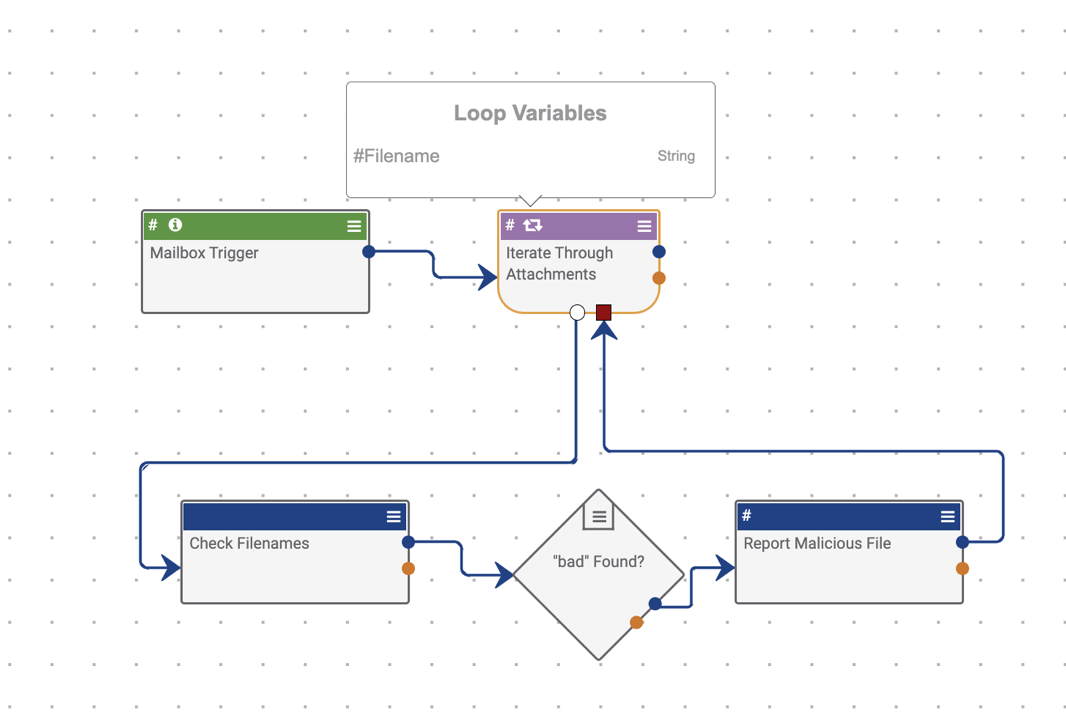
- Continue to build the Playbook by adding Apps or Operators that connect to the success and/or failure paths (i.e., the blue and orange dots, respectively) of the Iterator Operator.
Break Iterator Operator
The Break Iterator Operator is used after the If/Else Operator to define a break condition for a loop or break from a loop directly after an App failure.
- Click
 Operators on the side navigation bar of the Playbook Designer and select Break Iterator from the list. A Break Iterator Operator will be displayed in the Playbook Designer (Figure 10).
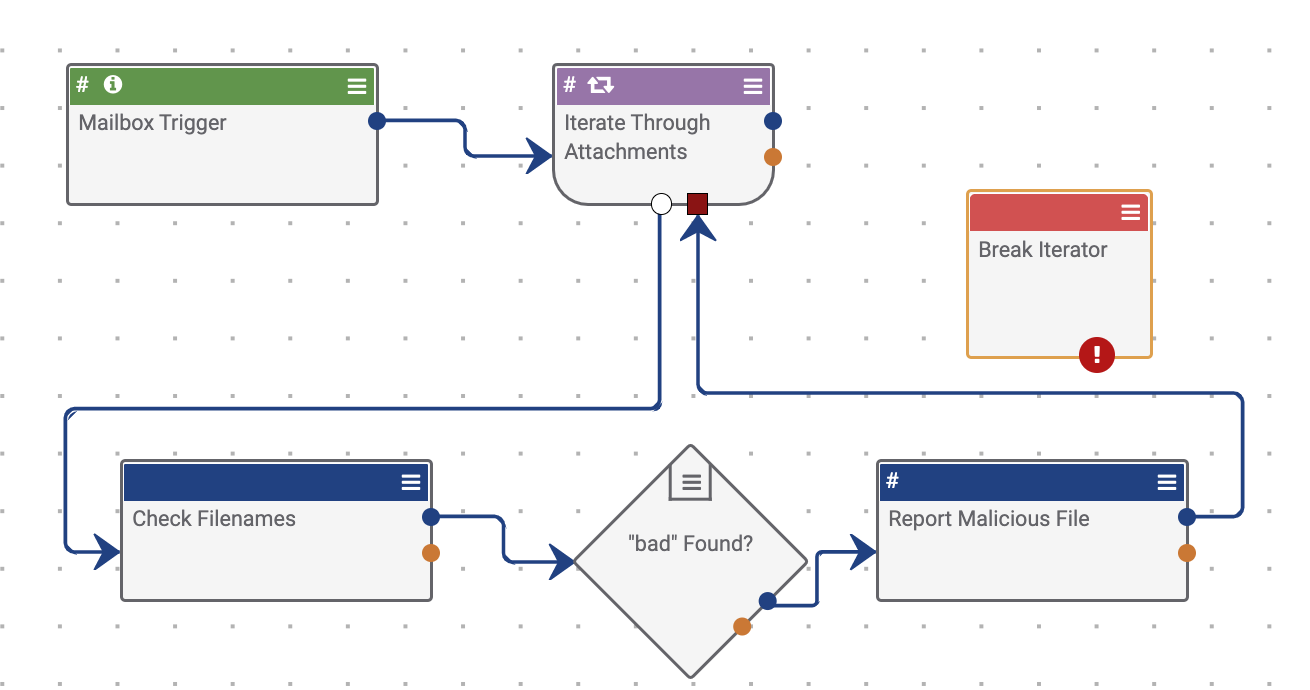
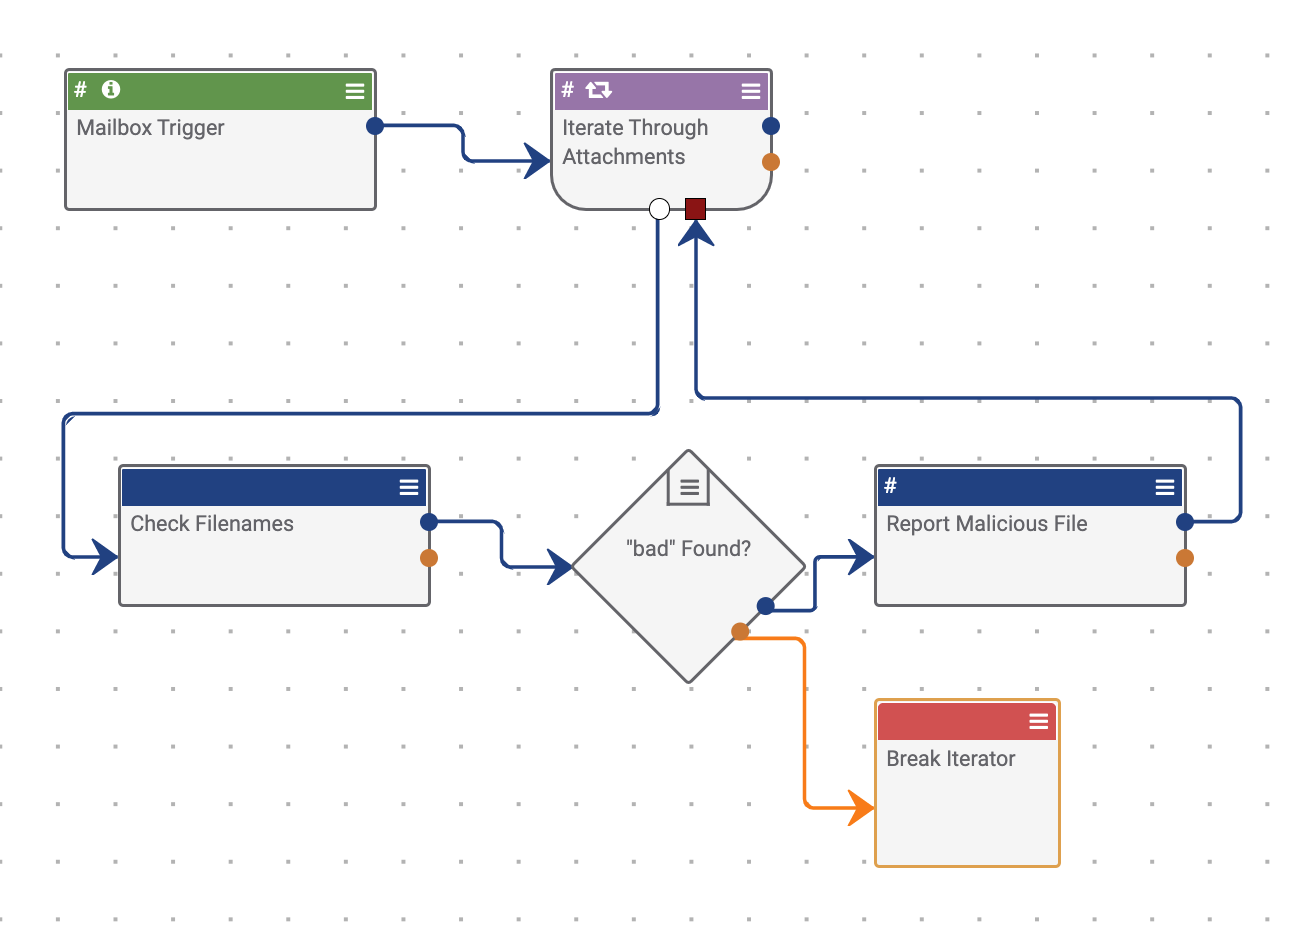
- Move the Break Iterator Operator as desired, and connect the orange circle node of an If/Else Operator (“bad” Found? in this example) to the Break Iterator Operator (Figure 11).
- Double-click the Break Iterator Operator to display the Edit Operator configuration pane on the left side of the Playbook Designer (Figure 12).
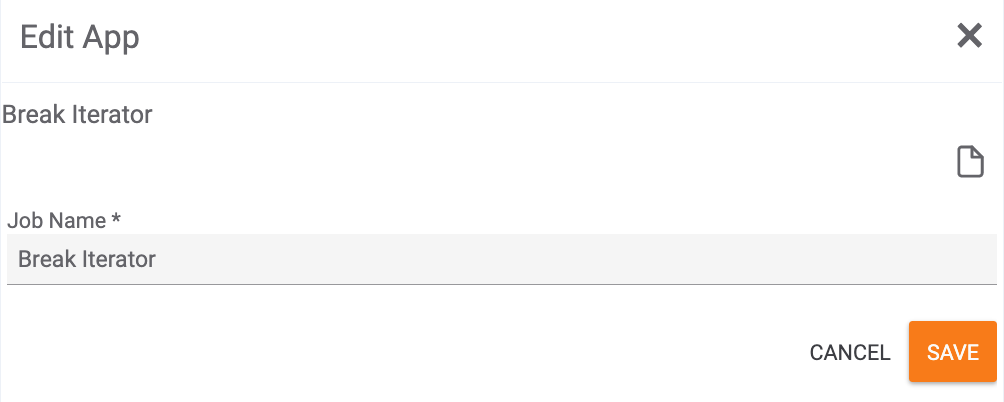
- Job Name: Enter a name for the Break Iterator Operator.
- Click the SAVE button to save the configuration.
- If the condition that leads to the Break Iterator Operator occurs, the loop will exit and continue to the success path of the Iterator Operator (i.e., the path coming from the blue dot of the Iterator Operator, which is not yet configured in this example).NoteWhen the Break Iterator Operator is executed, all iterations will stop, not just the one that led to the execution of the Break Iterator Operator.
ThreatConnect® is a registered trademark of ThreatConnect, Inc.
20085-01 v.03.A
Was this article helpful?
