Creating an Inbound TAXII Exchange Feed
- 04 Mar 2024
- 4 Minutes to read
-
Print
-
DarkLight
Creating an Inbound TAXII Exchange Feed
- Updated on 04 Mar 2024
- 4 Minutes to read
-
Print
-
DarkLight
Article Summary
Share feedback
Thanks for sharing your feedback!
Overview
An Inbound TAXII™ Exchange Feed ingests STIX™ (Structured Threat Information eXpression)–formatted data from a TAXII server.
Before You Start
| Minimum Role(s) | Organization role of Standard User |
|---|---|
| Prerequisites | A Source administered by your Organization |
Creating an Inbound TAXII Exchange Feed
- Log into ThreatConnect with an account that has access to the desired Source.
- On the top navigation bar, click Posts. The Posts screen will be displayed.
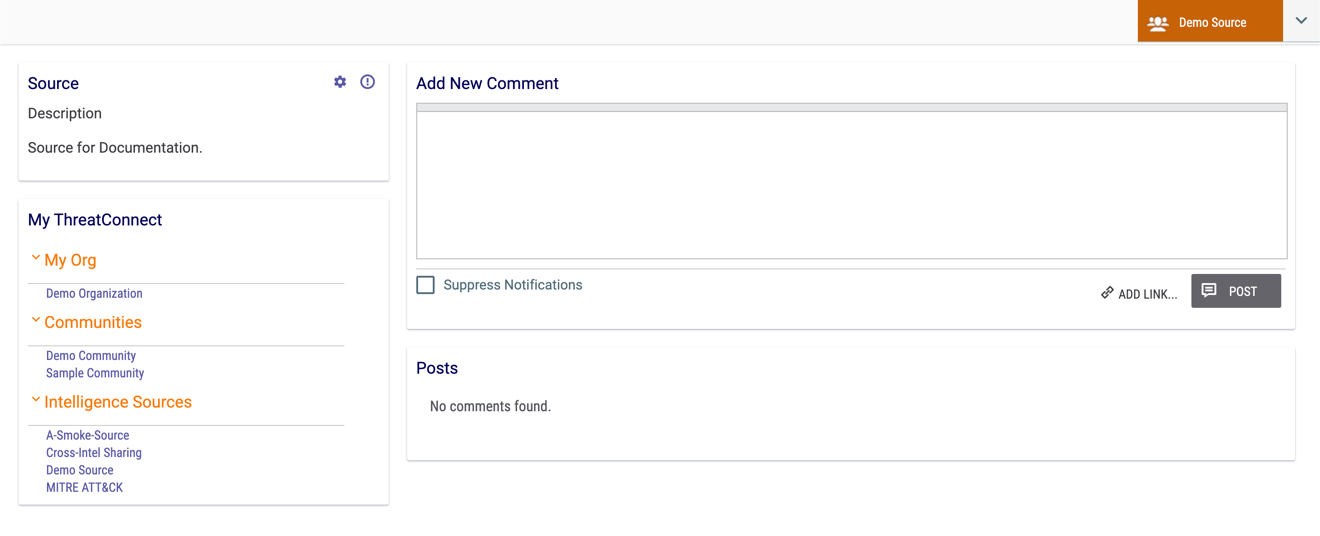
- Select a Source using the selector at the upper-right corner of the screen or from the Intelligence Sources section of the My ThreatConnect card on the left side of the screen. The Posts screen for the selected Source will be displayed (Figure 1).
- Click Source Config
 at the upper-right corner of the Source card. The Attribute Types tab of the Source Config screen will be displayed.
 - Click the Data tab. The Data screen will be displayed (Figure 2).

- Click the + NEW INBOUND button. The Configure Inbound TAXII Exchange window will be displayed with the TAXII tab highlighted (Figure 3).
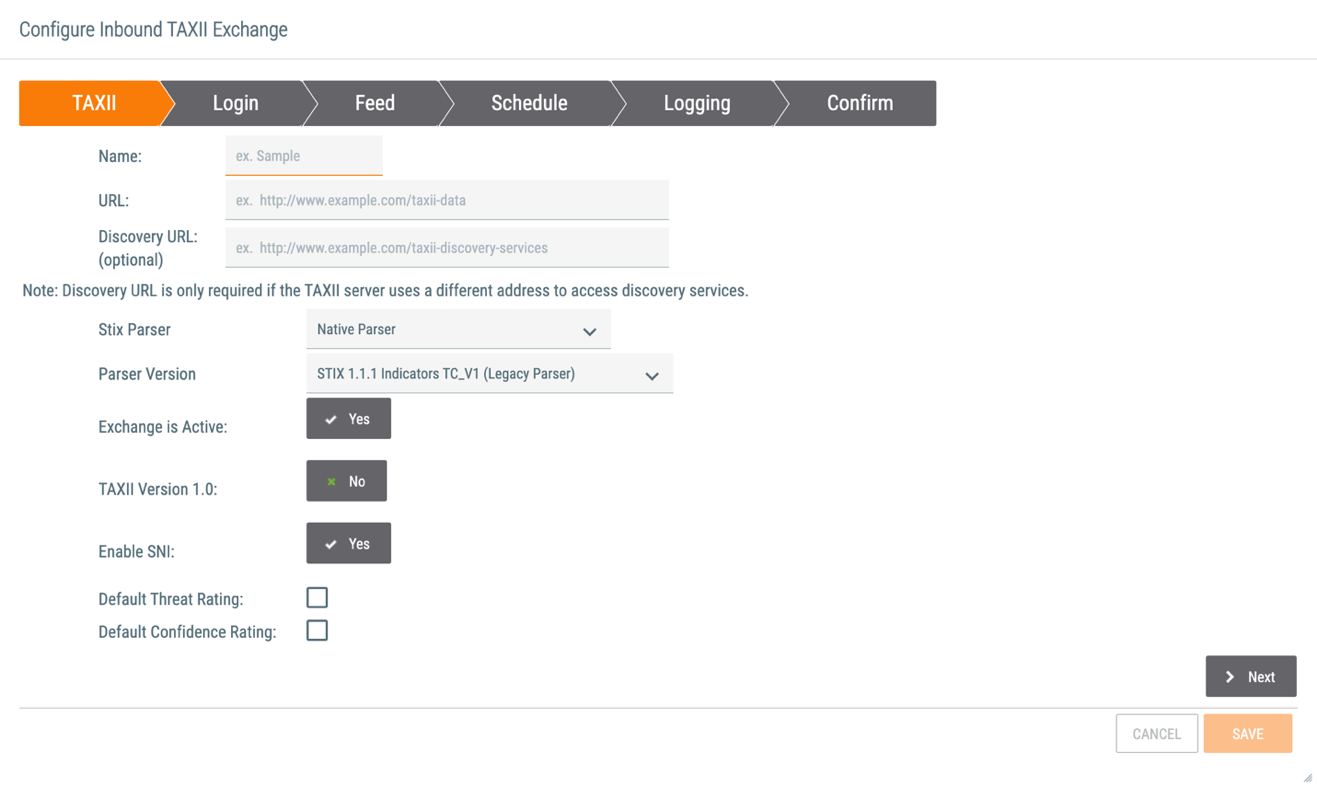
- Name: Enter a name for the Inbound TAXII Exchange Feed.
- URL: Enter a URL for the Inbound TAXII Exchange Feed.
- Discovery URL: If applicable, enter a Discovery URL for the Inbound TAXII Exchange Feed.
- Stix Parser: Select the STIX parser to use in the Inbound TAXII Exchange Feed. The STIX parser will determine how incoming STIX documents are interpreted and subsequently imported into ThreatConnect. Select STIX 1.1.1 Parser, which replaces Attributes, or STIX 1.1.1 Parser (Attribute Merge), which appends Attributes. See STIX and CybOX Parser Data Mappings for the data mappings that apply to the STIX 1.1.1 parser. Do not select Native Parser (the current default option), because it is being deprecated in the near future. Existing configurations using the Native Parser should be migrated as soon as possible.
- Parser Version: If you selected an option other than Native Parser from the Stix Parser dropdown menu, this field will not be available. As stated in the explanation for the Stix Parser field, you should not select Native Parser.
- Exchange is Active: Select whether to activate the Inbound TAXII Exchange Feed.
- TAXII Version 1.0: Select whether to use TAXII Version 1.0. A selection of No indicates that TAXII Version 1.1 is to be used.
- Enable SNI: Select whether to enable Server Name Indication (SNI) when connecting to external TAXII servers.
- Default Threat Rating: Select this checkbox to enter a default Threat Rating. After you select this checkbox, five skulls will be displayed. Select the number of skulls to assign a Threat Rating.NoteIt is highly recommended to assign a Default Threat Rating value at this time for follow-on analyst workflows, applications, or Playbooks that may need to query for Indicators.
- Default Confidence Rating: Select this checkbox to enter a default Confidence Rating. After you select this checkbox, a slider will be displayed. Drag the slider to assign a Confidence Rating.NoteIt is highly recommended to assign a Default Confidence Rating value at this time for follow-on analyst workflows, applications, Indicator deprecation, or Playbooks that may need to query for Indicators.
- Click the Next button.
- The Login screen will be displayed (Figure 4).
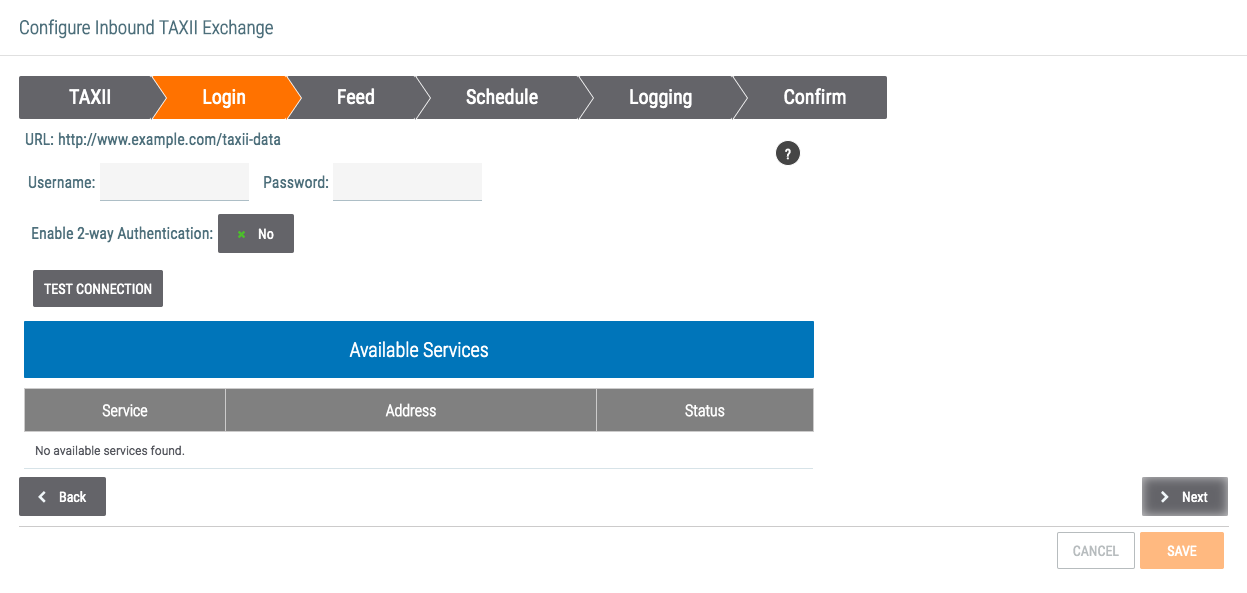
- URL: Verify that the URL displayed matches the one entered on the TAXII screen.
- Username: Enter the username to use to connect to the feed.
- Password: Enter the password to use to connect to the feed.
- Enable 2-way Authentication: Click on the gray rectangle and toggle to Yes to provide a Certificate. Enter the Private Key and Certificate found in the .pem certificate file. If the certificate in the .pem certificate file is not in Private Key PKCS#8 format, then it will need to be converted before it is entered into ThreatConnect. As the type of Private Key required by the distant TAXII server can vary, please contact the TAXII server administrator for information about the standard required for that server. Then extract and convert the saved .pem file to the proper format.
- TEST CONNECTION: Click this button to test the connection if the remote TAXII server allows for connection testing.
- If the connection was tested and successful, the Available Services table will be populated. Select the appropriate Service if applicable.
- Click the Next button.
- The Feed screen will be displayed (Figure 5).

- Feed: If applicable, enter the desired feed name or the feed name provided by the administrator of the remote TAXII server. If no feed name has been entered, click Check for available feeds and then select a feed from the table to populate this field.
- Subscription: If applicable, enter a subscription ID.
- Check for available feeds: If the remote TAXII server allows for this functionality, click Check for available feeds to view a table of available feeds. Select a feed from the table and then click the Select Feed button to populate the Feed field with the information for that feed.
- Click the Next button.
- The Schedule screen will be displayed (Figure 6).

- Poll Start Date: Select the date and time from which the TAXII server should start polling data.
- Collection Interval (hours): Enter the date–time range, in hours, for polling requests. For example, if it is set to 4 hours, the TAXII service will poll for and receive data in 4-hour increments from the TAXII server.
- Click the Next button.
- The Logging screen will be displayed (Figure 7).
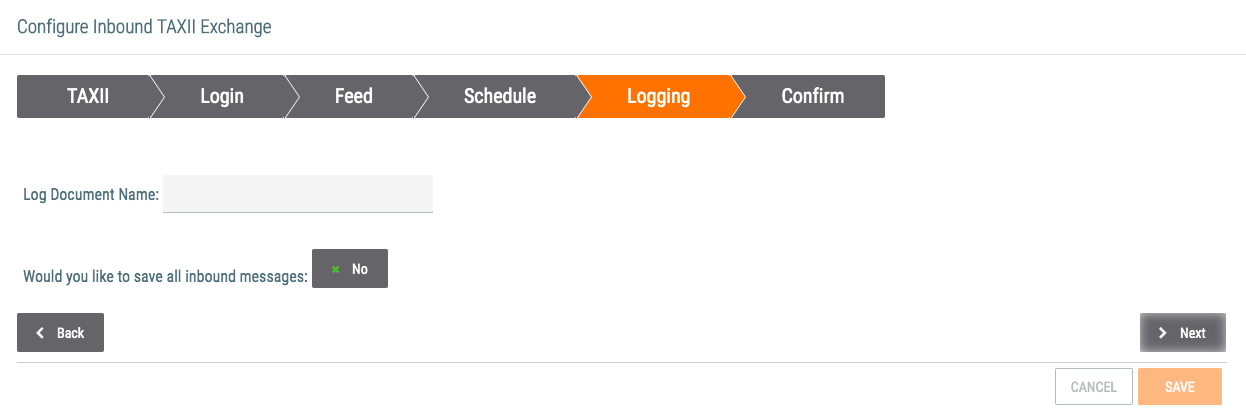
- Log Document Name: Enter a name for the document containing logs.
- Would you like to save all inbound messages: If document storage has been allocated for the Source, click on the gray rectangle to toggle to Yes.
- Click the Next button.
- The Confirm screen will be displayed (Figure 8).
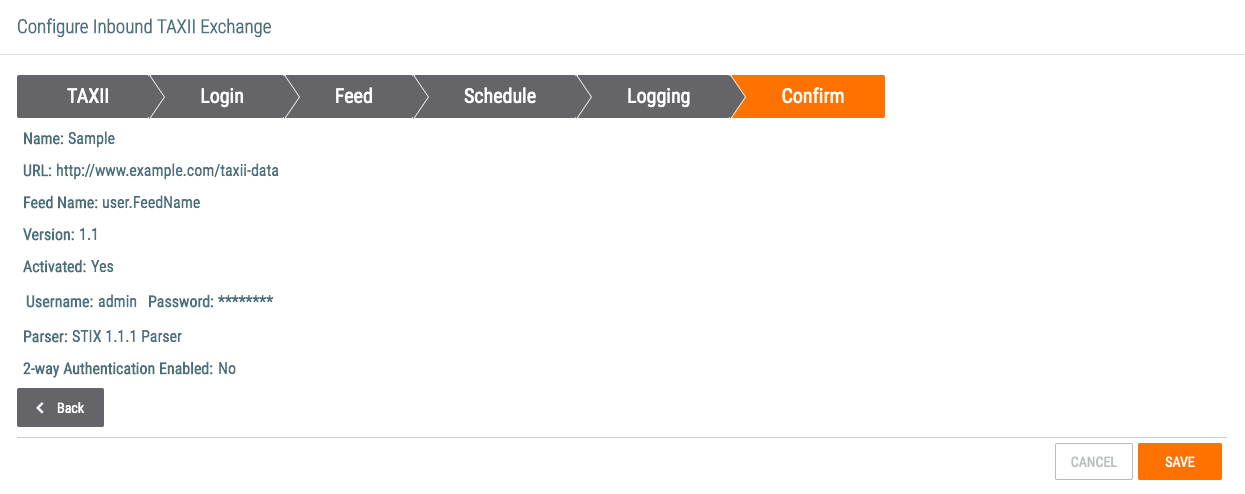
- Confirm that the entered information is correct.
- Click the SAVE button.
ThreatConnect® is a registered trademark of ThreatConnect, Inc.
CybOX™, STIX™, and TAXII™ are trademarks of The MITRE Corporation.
20058-01 v.06.B
Was this article helpful?
