Creating a Phishing Mailbox
- 04 Mar 2024
- 4 Minutes to read
-
Print
-
DarkLight
Creating a Phishing Mailbox
- Updated on 04 Mar 2024
- 4 Minutes to read
-
Print
-
DarkLight
Article Summary
Share feedback
Thanks for sharing your feedback!
Overview
Phishing mailboxes receive malicious or suspicious emails that are flagged by the Email Security Gateway, or emails in .msg or .eml format that have been flagged by a security analyst. When creating a phishing mailbox, the Organization Administrator specifies whether the mailbox is meant to receive emails directly from network devices or email headers in the form of attachments. ThreatConnect® will parse these emails and, if the email meets the minimum email scoring threshold after the parsing is complete, perform the following actions:
- create an Email Group object containing the email’s header and body
- create a Task Group object signaling that the email is ready for additional processing
- link previously existing Indicators to the Email Group, if they are found in the header or body
- link previously existing Victim email addresses to the Email Group, if they are found in the header or body
Before You Start
| Minimum Role(s) |
|
|---|---|
| Prerequisites | None |
Creating a Phishing Mailbox
Creating a Phishing Mailbox in an Organization
- Log into ThreatConnect with an Organization Administrator account.
- On the top navigation bar, hover the cursor over Settings
 and select Org Settings. The Organization Settings screen will be displayed with the Membership tab selected.
 - Click the Email tab. The Email screen will be displayed (Figure 1).
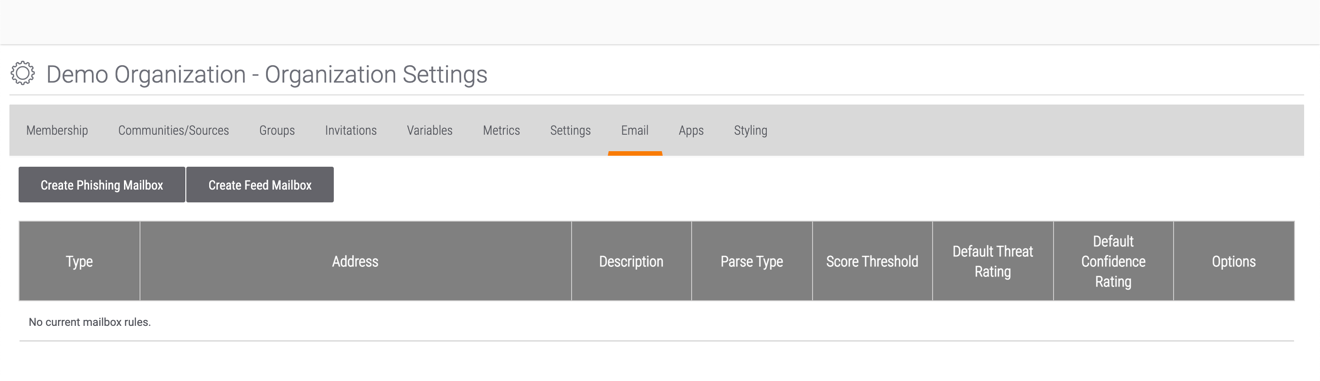
- Click the Create Phishing Mailbox button. The Phishing Mailbox Administration window will be displayed with the Mailbox tab selected (Figure 2).
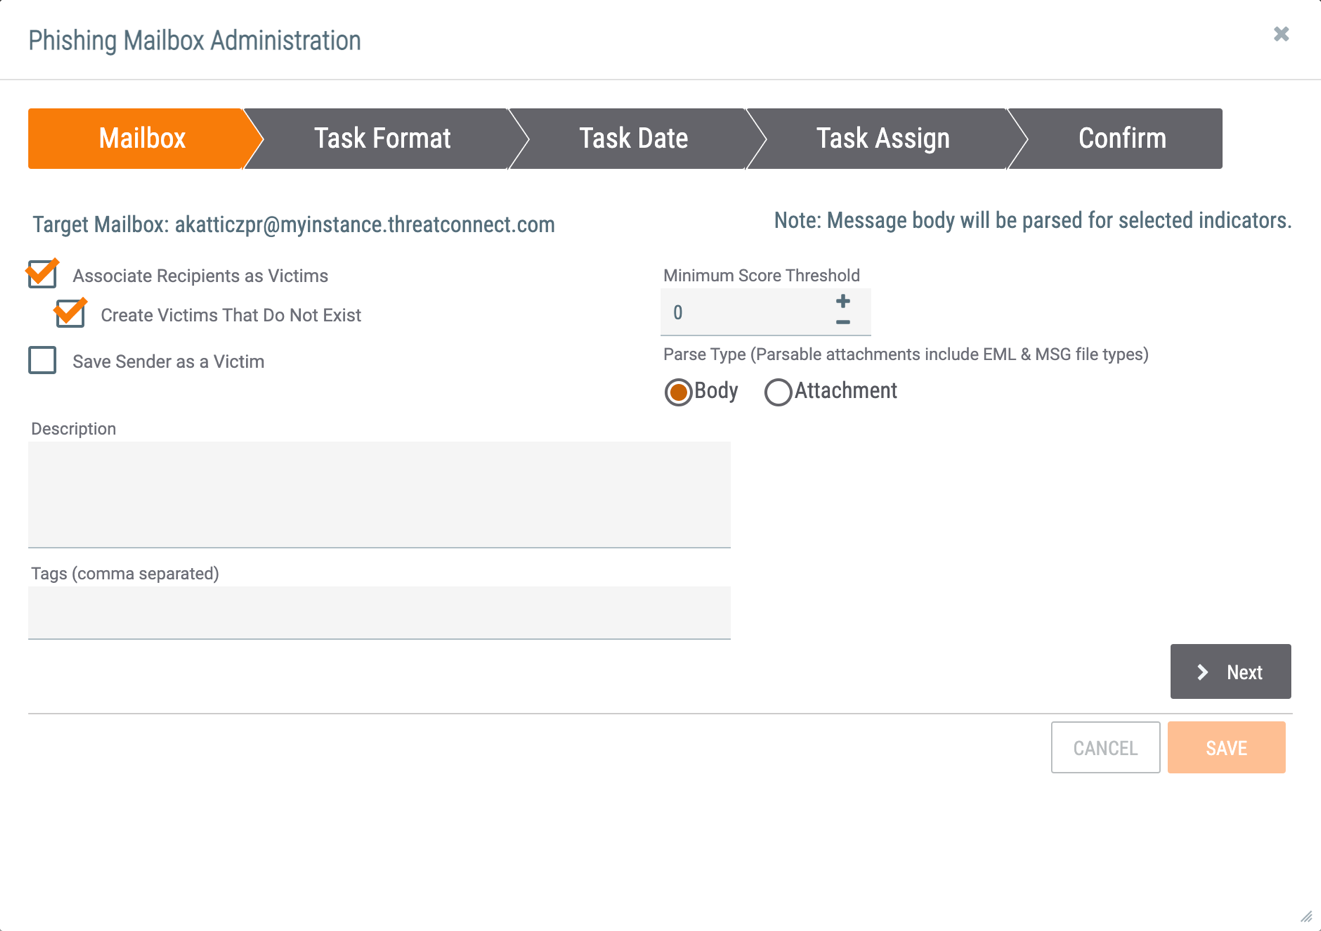 NoteA System role of Operations Administrator or Administrator is required to modify the Target Mailbox name at this step.
- Associate Recipients as Victims: Select this checkbox to create an association between the E-mail Group and the Victim(s) (i.e., the recipient(s) of the email).
- Create Victims That Do Not Exist: Select this checkbox to create Victims that do not already exist in the Organization. This option will be grayed out if the Associate Recipients as Victims checkbox is not selected.
- Save Sender as a Victim: Select this checkbox to save the sender of the email as a Victim that is associated with the E-mail Group. This option will be grayed out if the Associate Recipients as Victims checkbox is not selected.
- Minimum Score Threshold: Enter the minimum score that an email must meet to be processed.
- Parse Type: Select whether the Body of the email or the Attachment should be parsed for Indicators.ImportantIf the phishing mailbox is to parse out Victims, the Attachment option must be selected.
- Description: Enter a description for the phishing mailbox.
- Tags: Enter Tags, separated by commas, for the phishing mailbox.
- Click the Next button.
- The Task Format tab will be displayed (Figure 3).
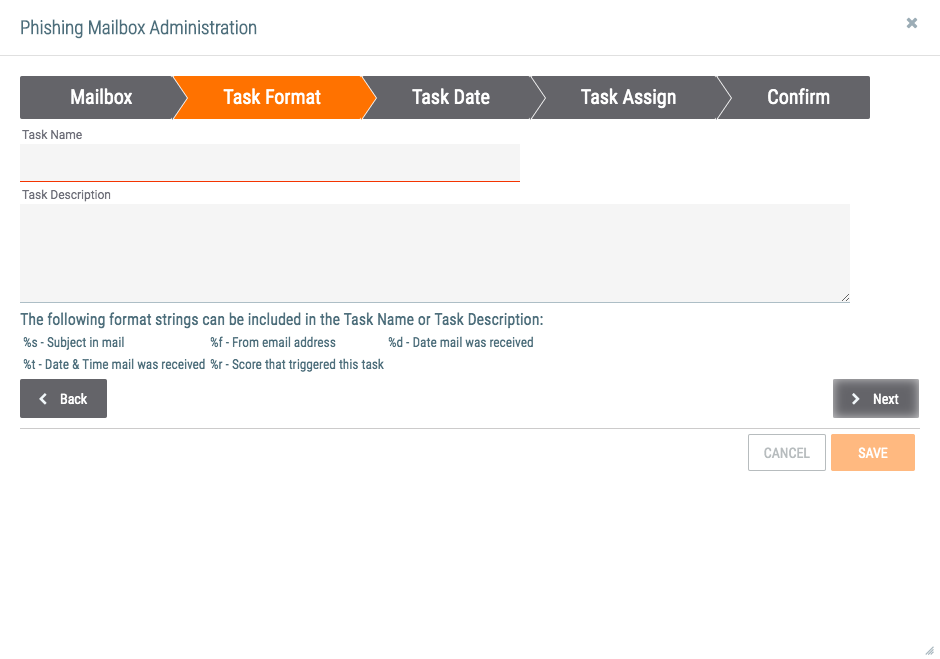
- Task Name: Enter a name for the Task that will be created and associated to the Email Group. The format strings provided under the Task Description can be used as variables for the corresponding information.
- Task Description: Enter a description for the Task. The format strings provided under the Task Description can be used as variables for the corresponding information.
- Click the Next button.
- The Task Date tab will be displayed (Figure 4).
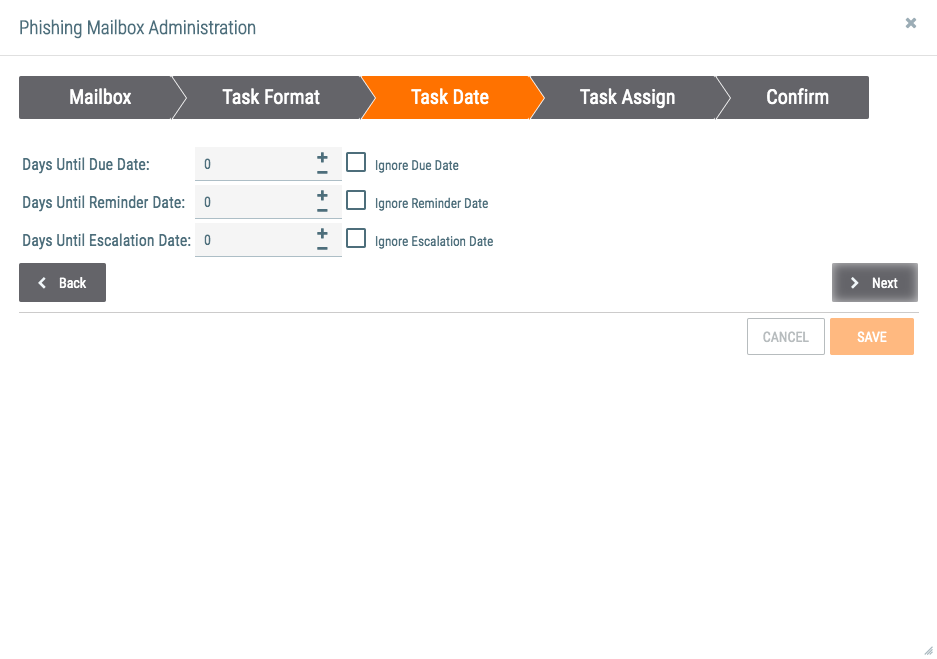
- Days Until Due Date: Enter the number of days remaining until the Task is due.
- Ignore Due Date: Select this checkbox to ignore the due date. Doing so will gray out the Days Until Due Date field.
- Days Until Reminder Date: Enter the number of days until a reminder is issued about the due date.
- Ignore Reminder Date: Select this checkbox to ignore the reminder date. Doing so will gray out the Days Until Reminder Date field.
- Days Until Escalation Date: Enter the number of days remaining until the Task’s escalation date.
- Ignore Escalation Date: Select this checkbox to ignore the escalation date. Doing so will gray out the Days Until Escalation Date field.
- Click the Next button.
- The Task Assign tab will be displayed (Figure 5).
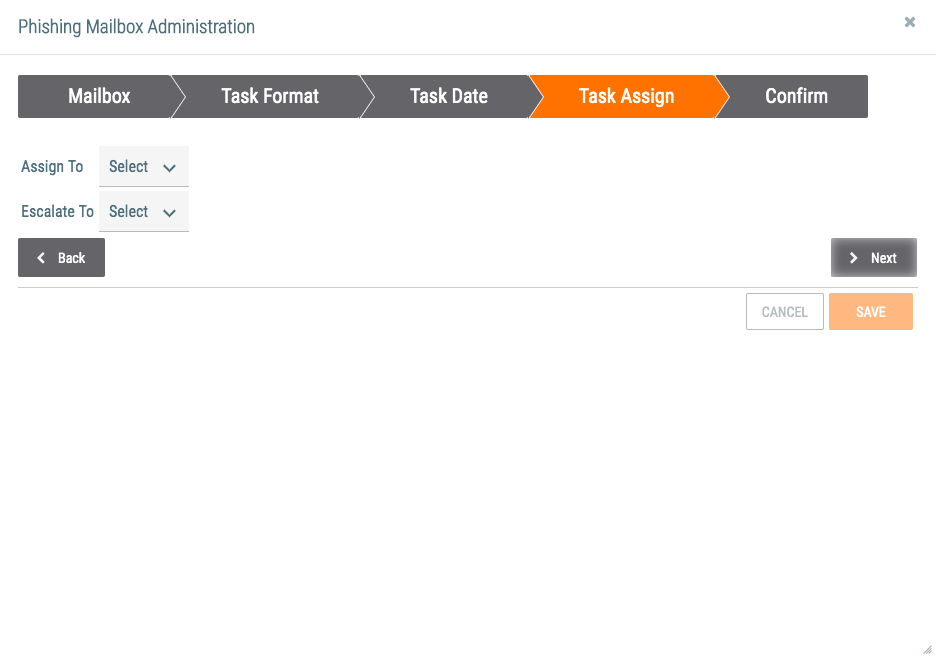
- Assign To: Select one or more users to which to assign the Task.
- Escalate To: Select one or more users to which to escalate the Task.
- Click the Next button.
- The Confirm tab will be displayed (Figure 6).
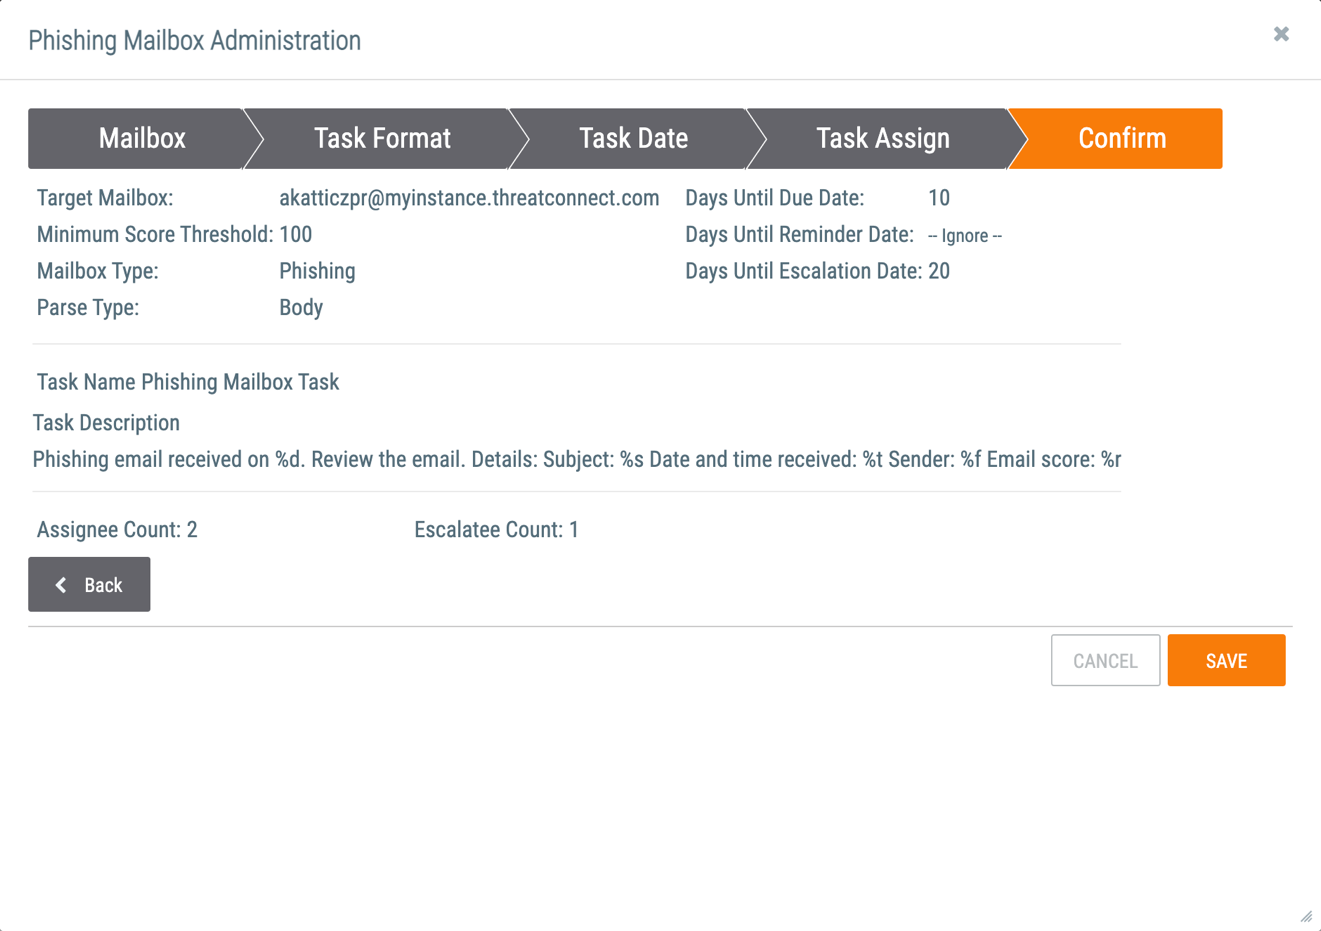
- Review the selections made for the phishing mailbox.
- Click the SAVE button.
- The phishing mailbox will be displayed on the Email tab of the Organization Settings screen (Figure 7). To edit or delete the phishing mailbox, click Edit
 or Delete
  , respectively, in the Options column.
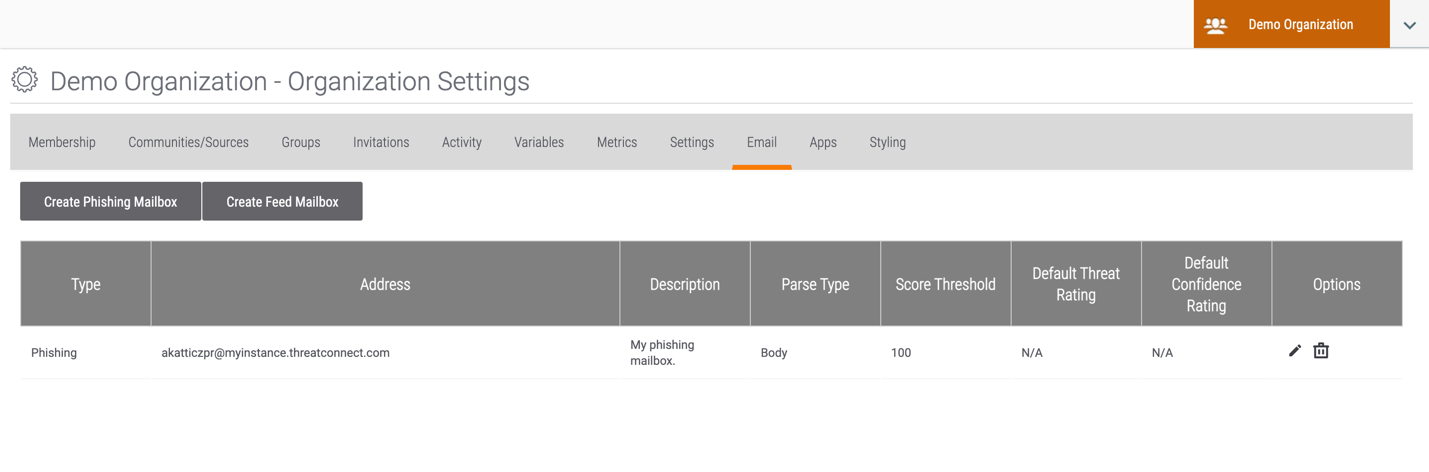
Creating a Phishing Mailbox in a Community or Source
- Log into ThreatConnect with an Editor or Director account for the desired Community or Source.
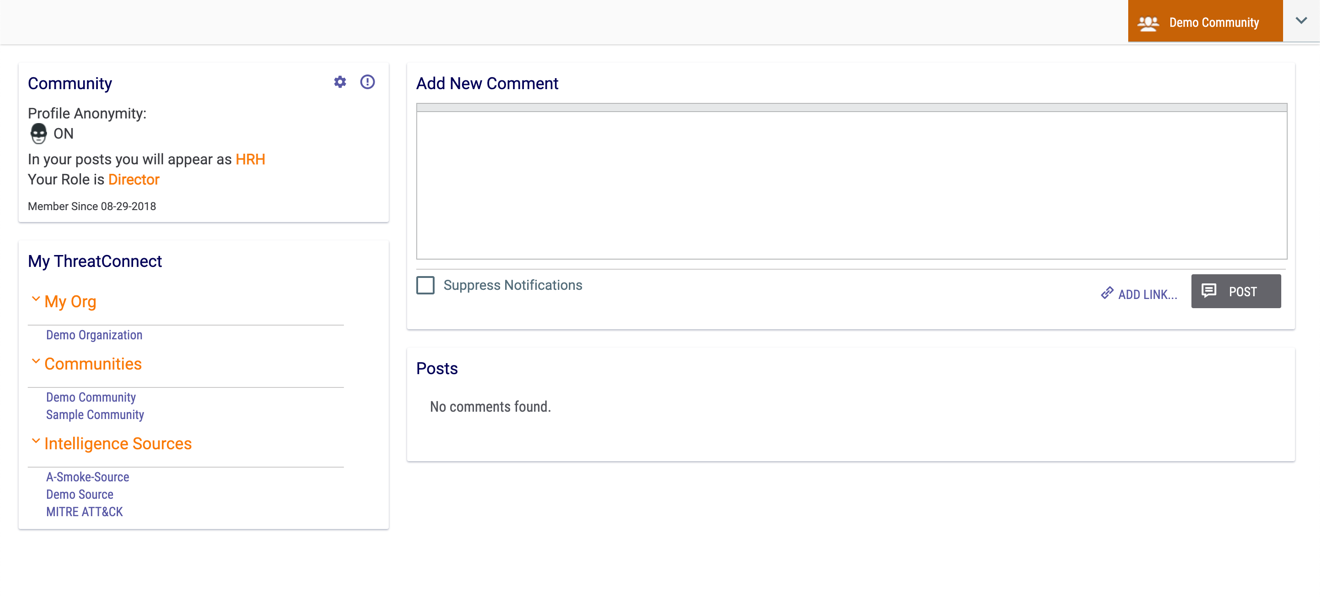
- On the top navigation bar, click Posts. The Posts screen will be displayed.
- Select the desired Community or Source (Demo Community in this example) from the My ThreatConnect card on the left side of the screen to display its Community or Source screen (Figure 8).
- Click the gear
 icon at the upper-right corner of the Community (or Source) card at the top left of the screen. The Community (or Source) Config screen will be displayed with the Attribute Types tab selected.
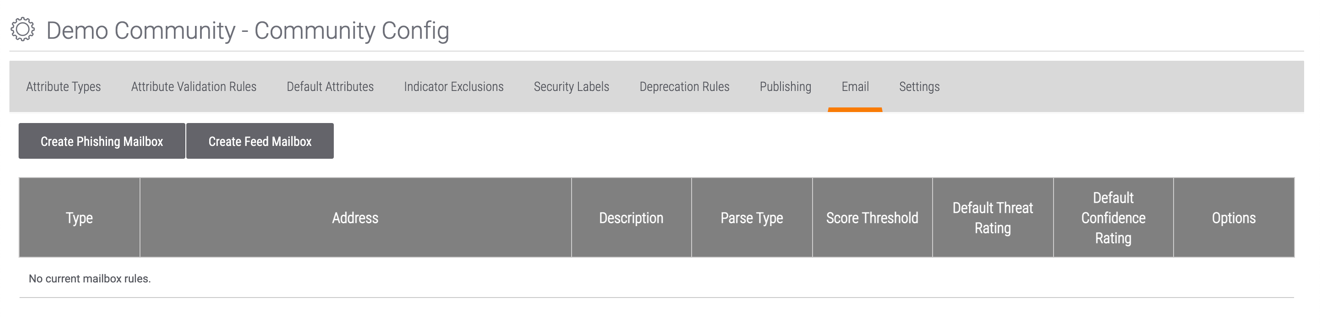
 - Click the Email tab. The Email screen will be displayed (Figure 9).
- Follow Steps 4–7 in the “Creating a Phishing Mailbox in an Organization” section to create a phishing mailbox in the selected Community or Source.
ThreatConnect® is a registered trademark of ThreatConnect, Inc.
20013-01 v.09.C
Was this article helpful?
